Made a trip to Spotlight yesterday and bought some stuff. It was such an exciting place. I never knew so many things existed. My eyes were almost popping out and I was really excited but had to restrain myself and pace the purchases as I can't possibly embark on so many projects at one time and certainly the pocket will not allow it. So here is the stash from Spotlight and Carefour for the kids' pressies this Christmas.
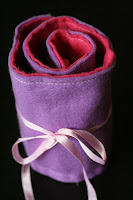
 I followed this tutorial and here is the first product.

 I sewed too close to the edges so I couldn't trim them with the pinking shears. Also realised that the colour pink for the pockets are a little light and it gets dirty all too quickly, even when I was inserting the crayons into them.
Also, my top stitching wasn't very nice so I was sewing and redoing them till I got a little worried cos the felt started getting furry. Thankfully, it was much better after I pressed it.


Here is the second one. To improve on my first one, I did the following:
1) sewed from the bottom edge of the pocket towards the opening instead of the other way so that I could do a backstitch at the end to reinforce the opening of the pocket with inside piece together. Also, cos I'll be doing a final top stitch on the bottom, it didn't matter as much if the threads unrevelled at the bottom as if they did at the top opening of the pockets. You'll be trimming that away in any case.
2) Made sure I gave a slightly wider allowance so that I could pink the edges.
These first two are for girls as you can tell from the colours used. The next one is for a boy so I didn't think ribbons would be suitable. Instead, I gave it a flap and used velcro instead. This is what it looked like. Again, the outer yellow is a tad too light and is already stained! :(


So..that's three pressies done in one day. Rather productive. Cool. Am pleased that I'm better with those top stitches after the first one and didn't have to redo them again and again.


Just a quick mental note. Would be good to stock up on ribbons and elastic straps on the next shopping trip.


2 comments:
Van, they turned out really nice! And to think you finished them in one sitting! Very amazing. And the velcro strap is very clever. So jealous that Kim let you do any sewing at all. Kate has not been very sewing-friendly these few days. You know the one thing more addictive than sewing? Shopping for supplies. And what's even more addictive than that? Blogging about both. Soon you'll be writing your own tutorials- wait and see! It's a slow descent into insanity, this craftiness. Welcome to loony city!
ahem. I was the one who suggested the velcro. AHEM.
Post a Comment